3D-Dig Automated Excavation & Dump
This course covers the 3D-Dig Automated Excavation and Dump Sequencing software module. The course consists of lessons organized into five course modules. Before commencing this course, you should be ...

Description and Content of 3D-Dig Automated Excavation & Dump
Description
This course covers the 3D-Dig Automated Excavation and Dump Sequencing software module. The course consists of lessons organized into five course modules. Before commencing this course, you should be familiar with the basics of 3D-Dig. These basics are covered in the 3D-Dig Foundations Learning Path. Some of this basic material is covered briefly in the following course, however it is assumed that you know how to set up a 3D-Dig file as well as work with free mode excavation and dump.
In the 3D-Dig software, Automated Excavation and Dump Sequencing is a stand-alone software module. It also forms the basis of several other 3D-Dig modules, including Truck and Shovel Simulation, Dragline Simulation, and Execution & Dumping.
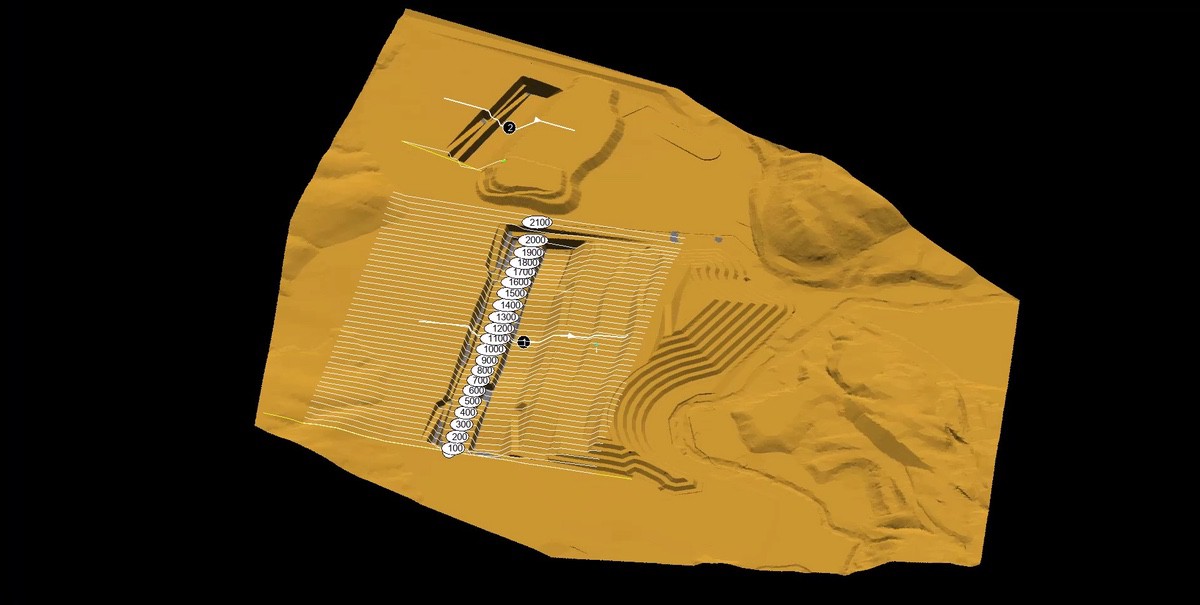
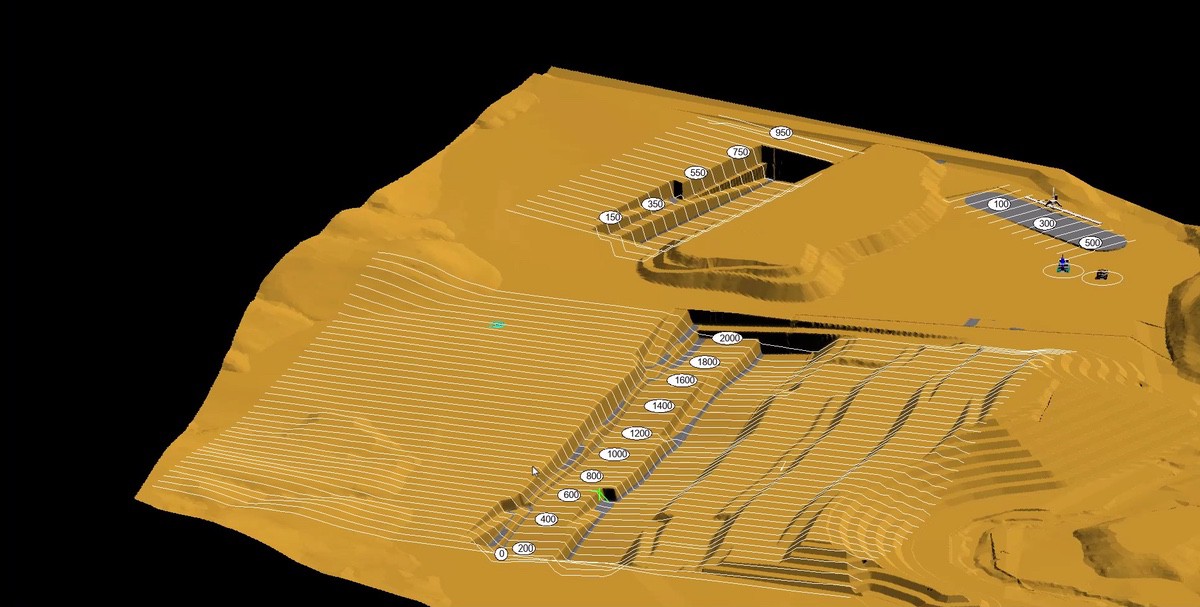
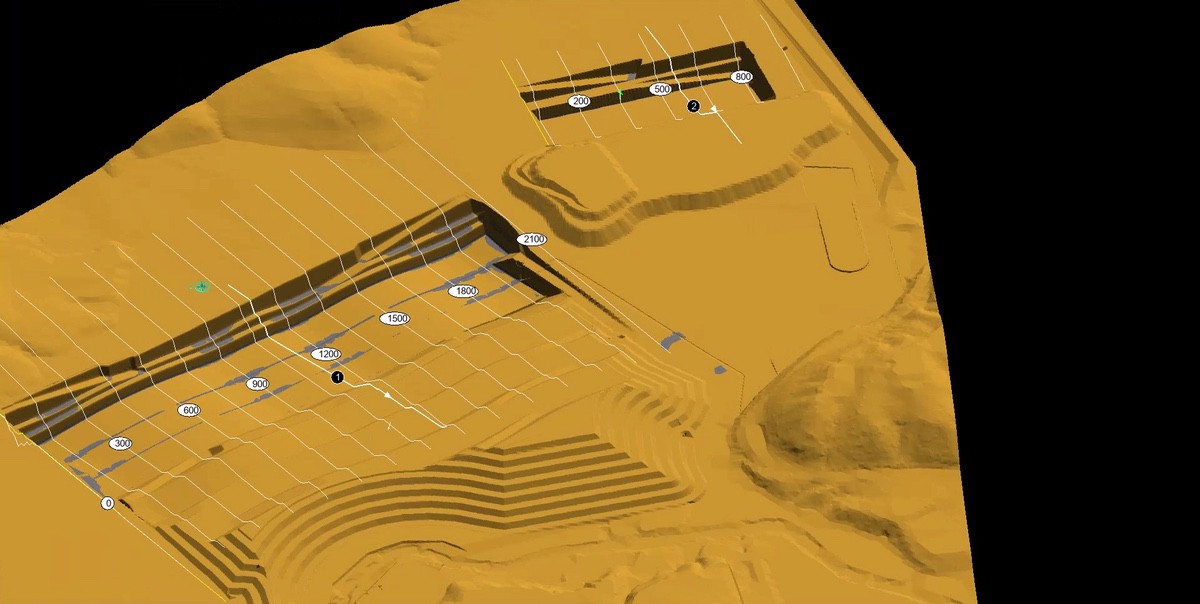
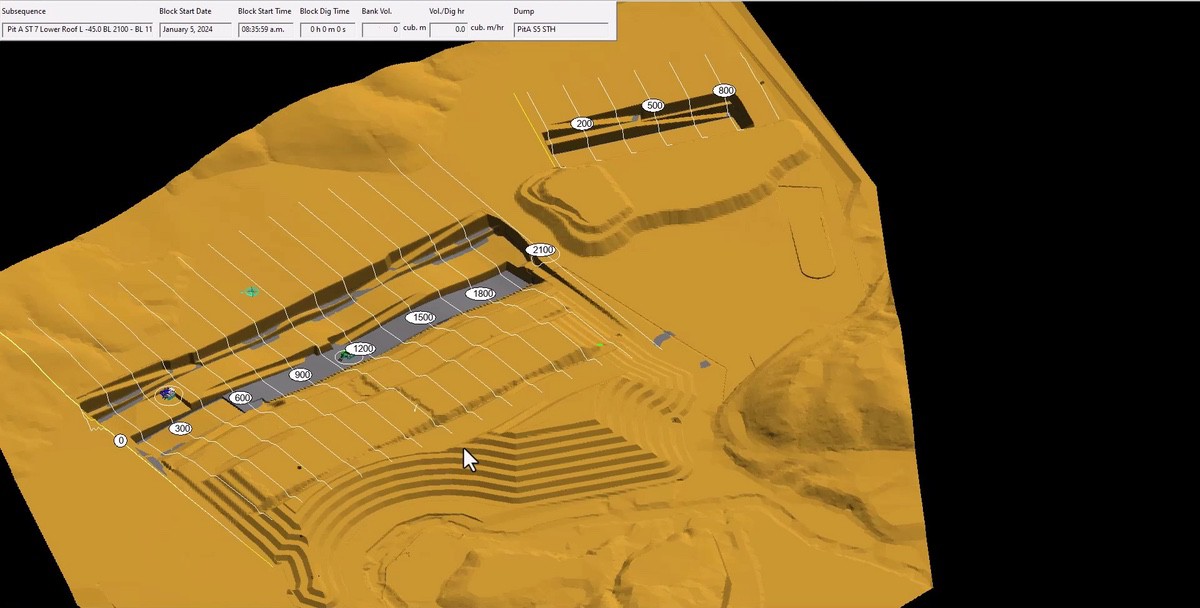
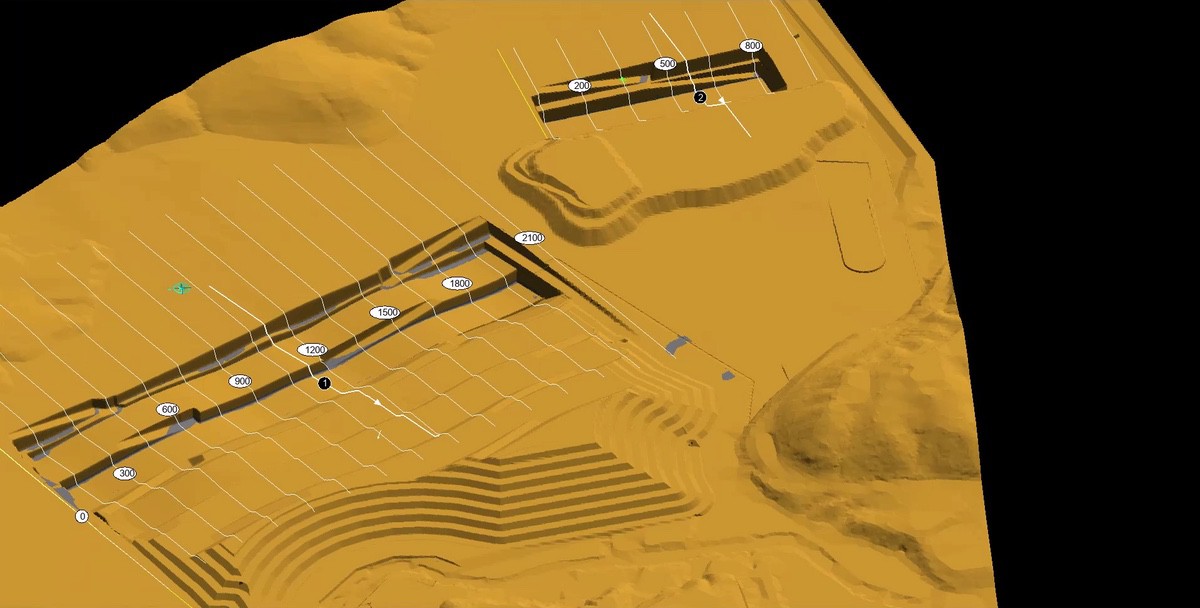
Automated Excavation and Dump models the sequential excavation of an operation in small increments in accordance with a schedule. The system allows simple operations to be simulated in the form of a single branch schedule, as well as complicated operations for multi-branch schedules.
After completing this course, you will acquire significant understanding of advanced 3D-Dig software and its applications. In this course you will learn the powerful functionality of 3D-Dig Automated Excavation & Dump Sequencing. This includes:
- Application of the Raw Sequence, Subsequences and Supersequences in operations of Staged Excavation and Dumping.
- The importance of Preset Productivities, Production Rates and Excavation Dependencies will be explained along with the related functionality.
- Execute operations, which allow introducing an extra fleet and operating with multiple fleets in complicated excavation and dumping simulations.
- See how to capture and create an animation of your simulations, and how to transfer and work with report files in Excel.
- At the end of the course, learn how to use 3D-Dig Automated Excavation & Dump Sequencing for Steep-Dipping Operations.
- You will also explore ways to slow down the speed of the simulation, re-order Supersequences, and using the Compound Supersequence and Simulation Map structures.
Certificate
By completing/passing this course, you will attain the certificate 3D-Dig Course Certificate
Content
-
This quick introductory module provides a brief, high-level overview of course content. You will meet your instructor and have the option to download a course data package as well as helpful course resources.
-
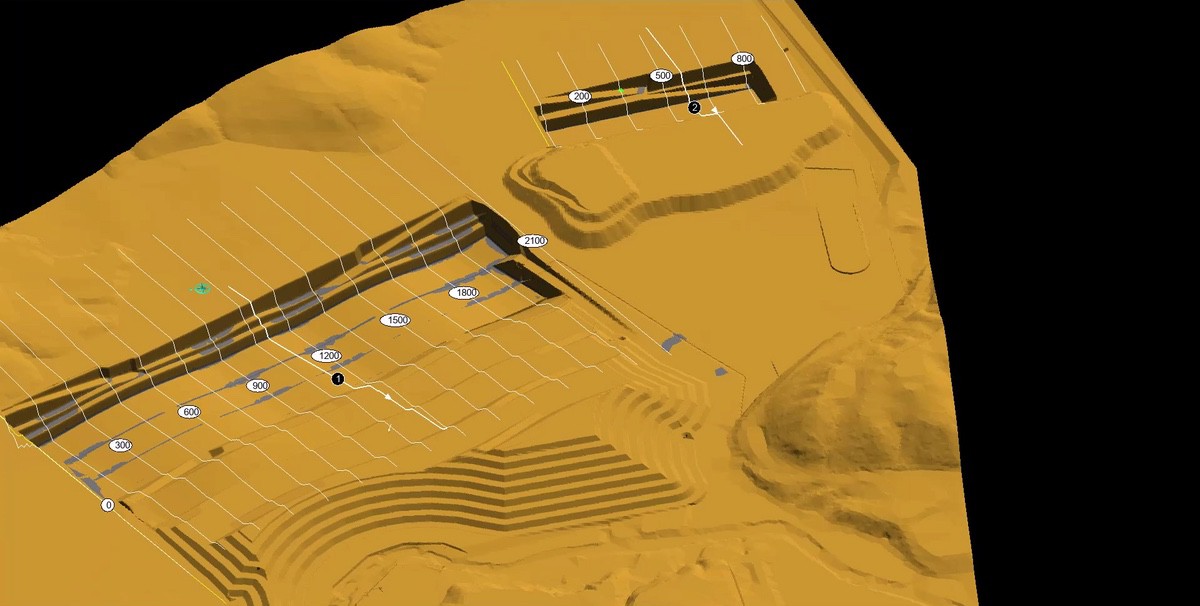
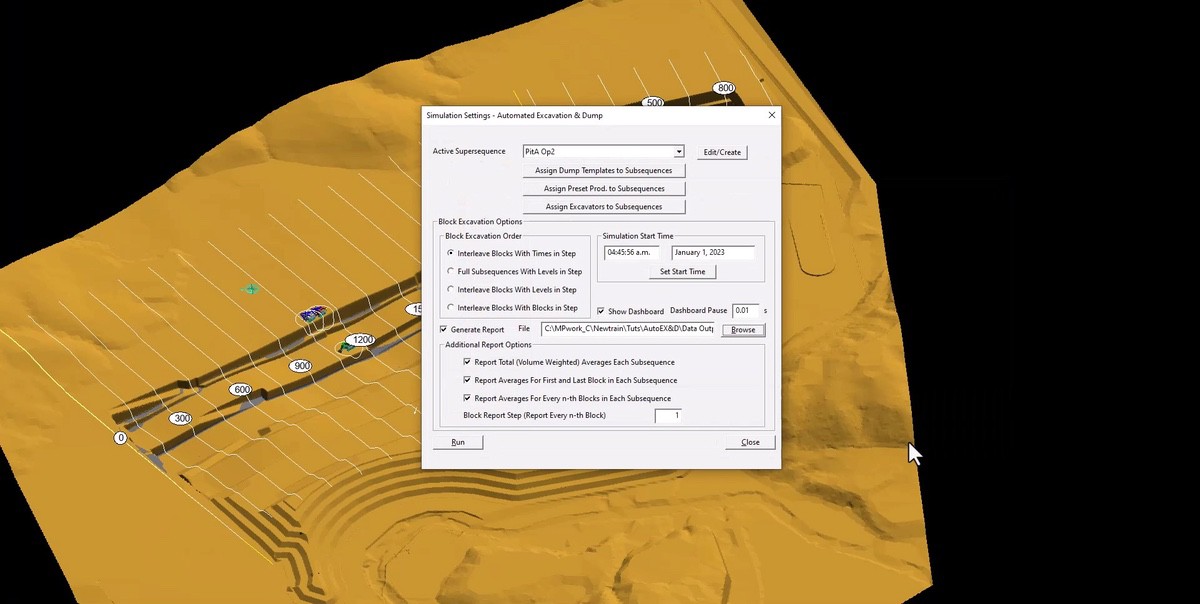
This module will introduce you to the possibilities and powerful functionality of the 3D-Dig Automated Excavation & Dump Sequencing module. You will learn about the tasks which may be performed using this module. This will give you an overview of the steps required to set up an automated excavation and dump simulation. During this process you will see the importance of Staged Excavation, Pass Parameters, and the connection between a Raw Sequence, Subsequences and the Supersequence. Also, the concept of a Prime Surface, with which you may already be familiar, will be briefly explained.
- Receive initial information about multi branch schedules, preset productivities, visualization of the process via option of capturing an animation, and reports detailing volumetrics and productivity information over time.
- Make acquaintance with the concepts of Subsequence and Supersequence, as well as a special type of excavation templates, known as Staged Excavation.
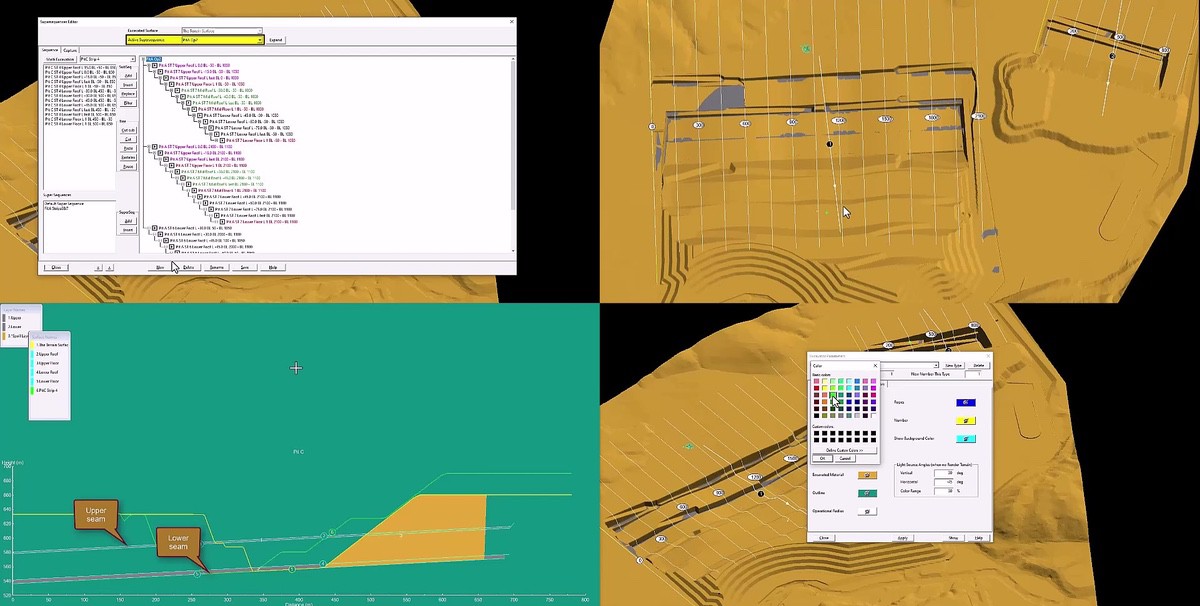
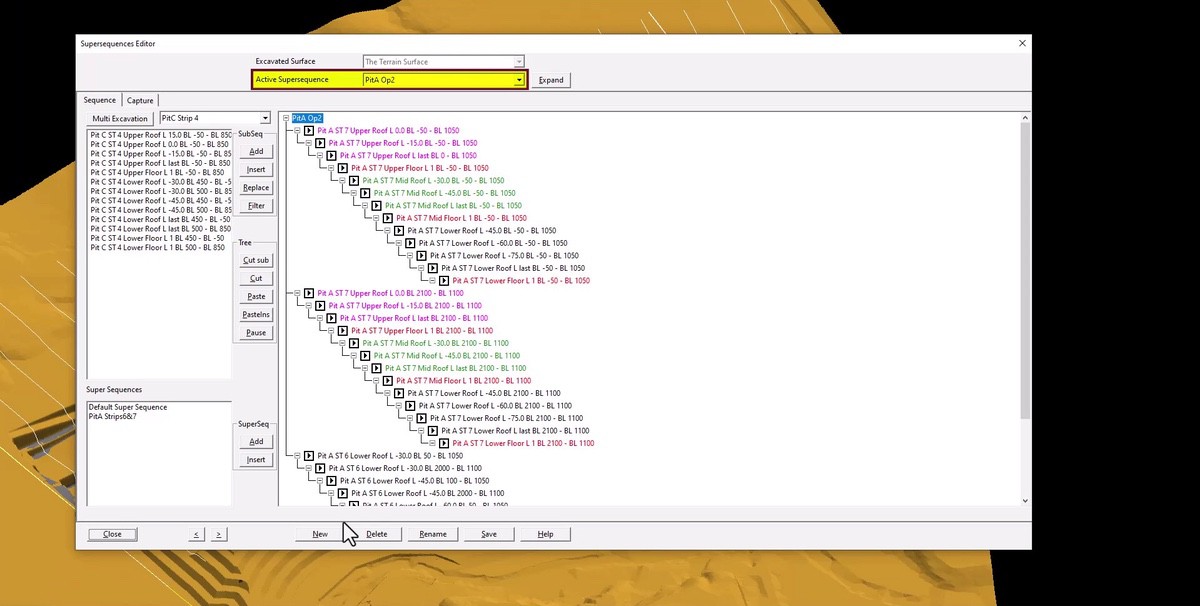
- Learn about Raw Sequences, Subsequences, and the branched tree-structure of the Supersequences.
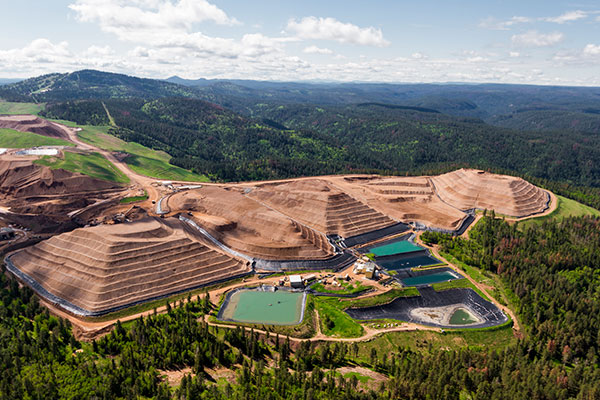
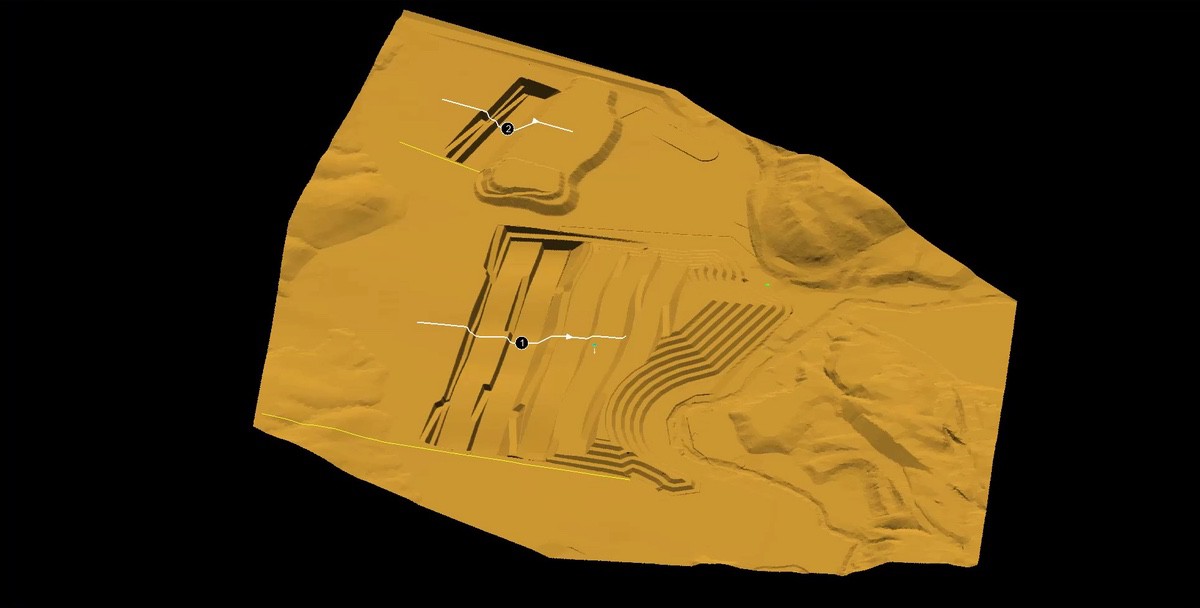
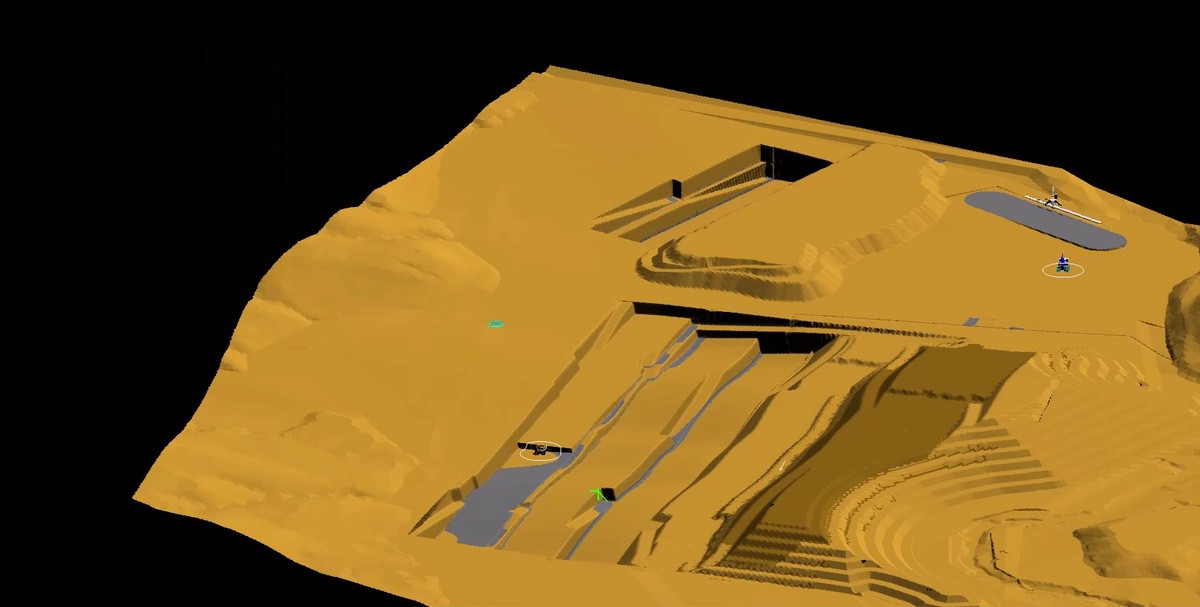
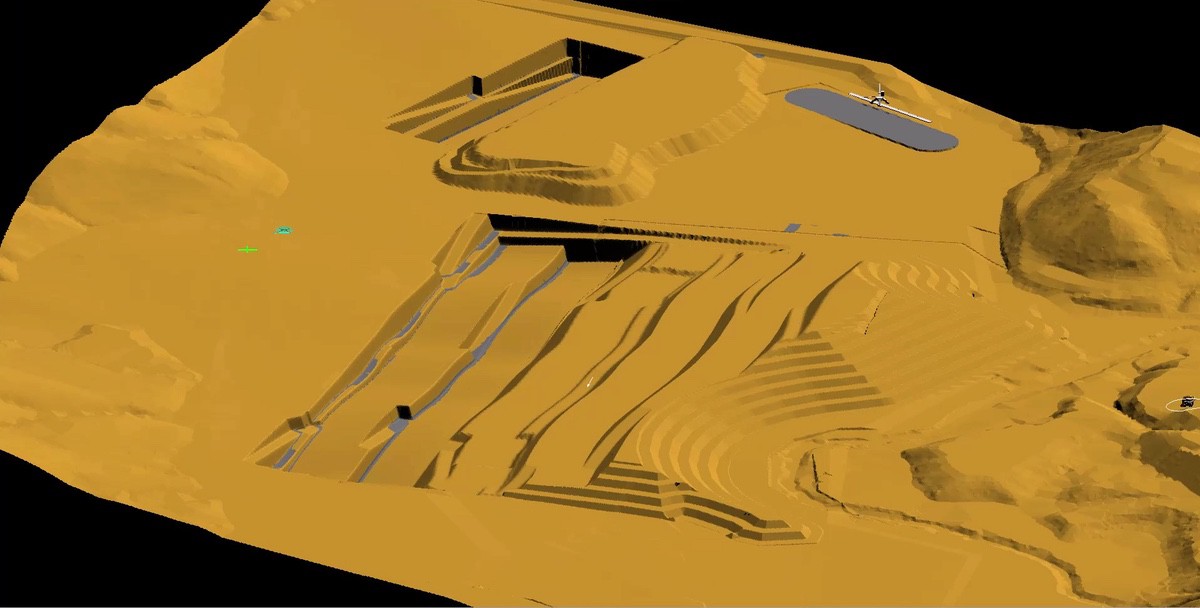
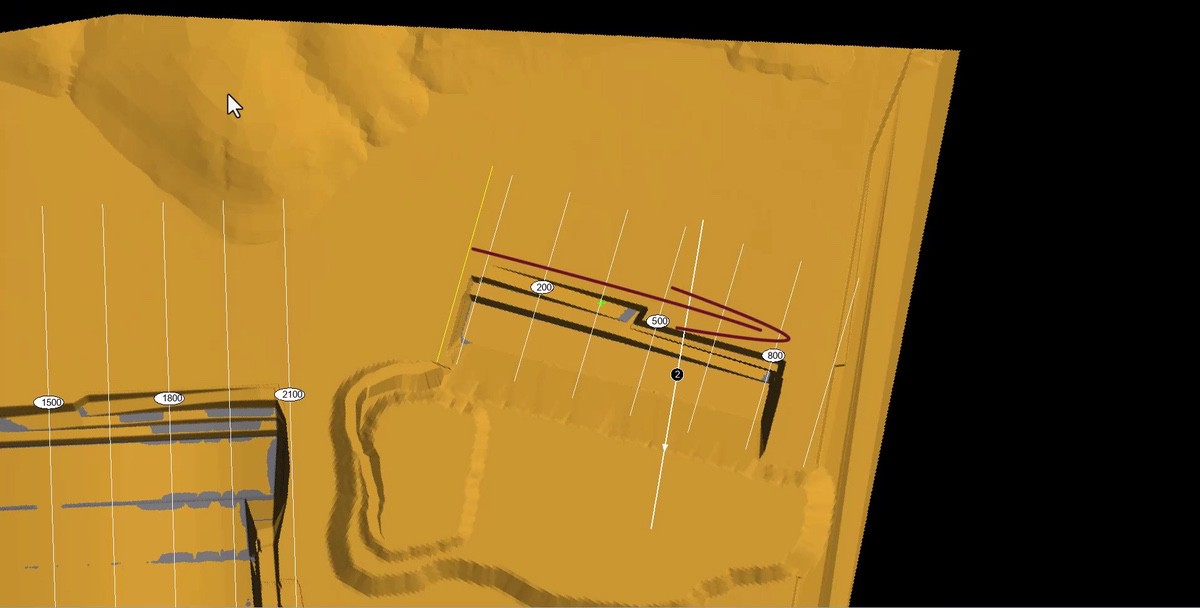
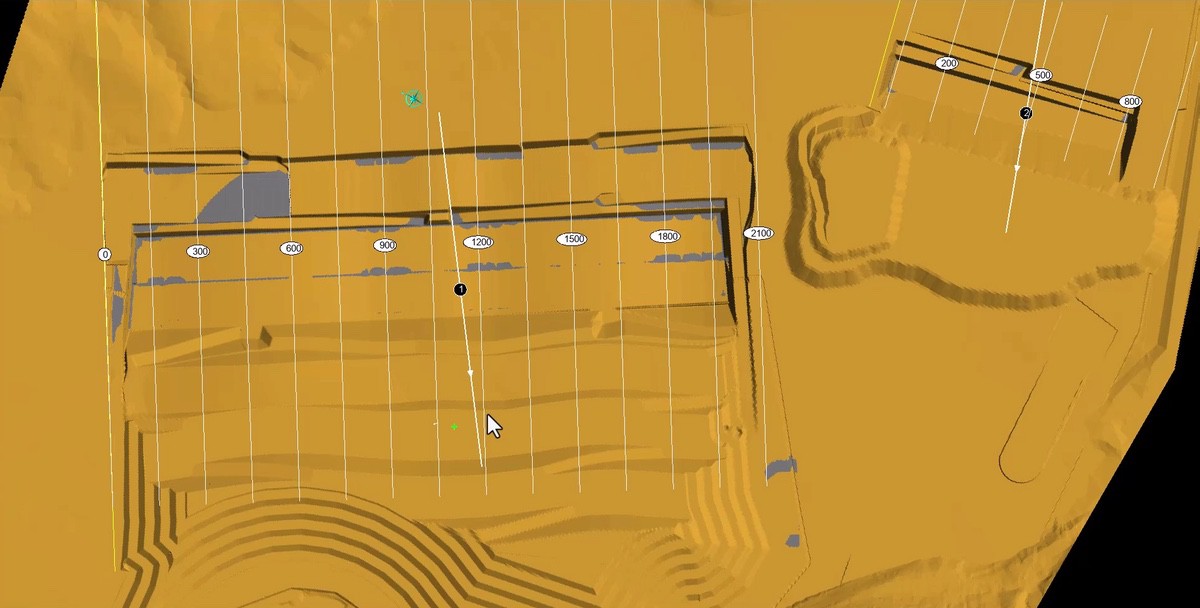
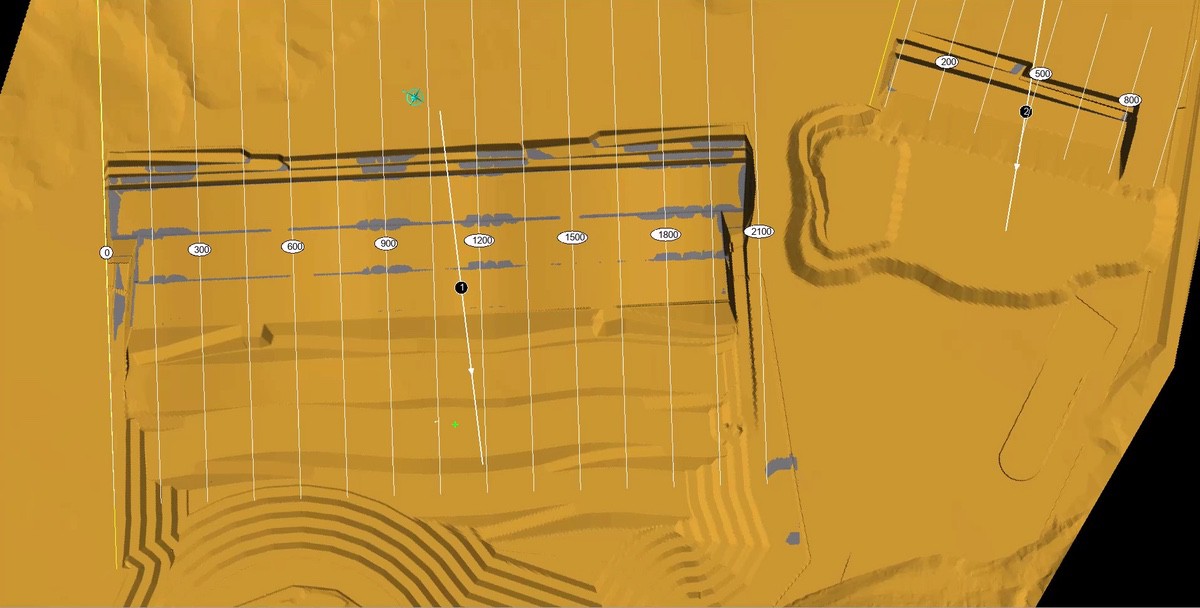
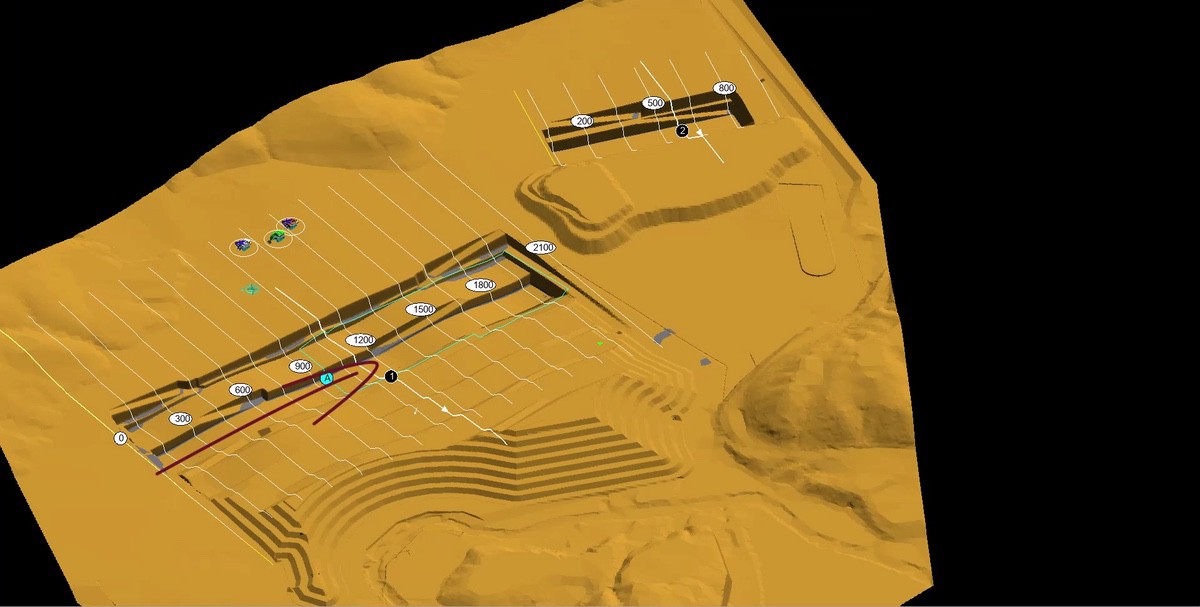
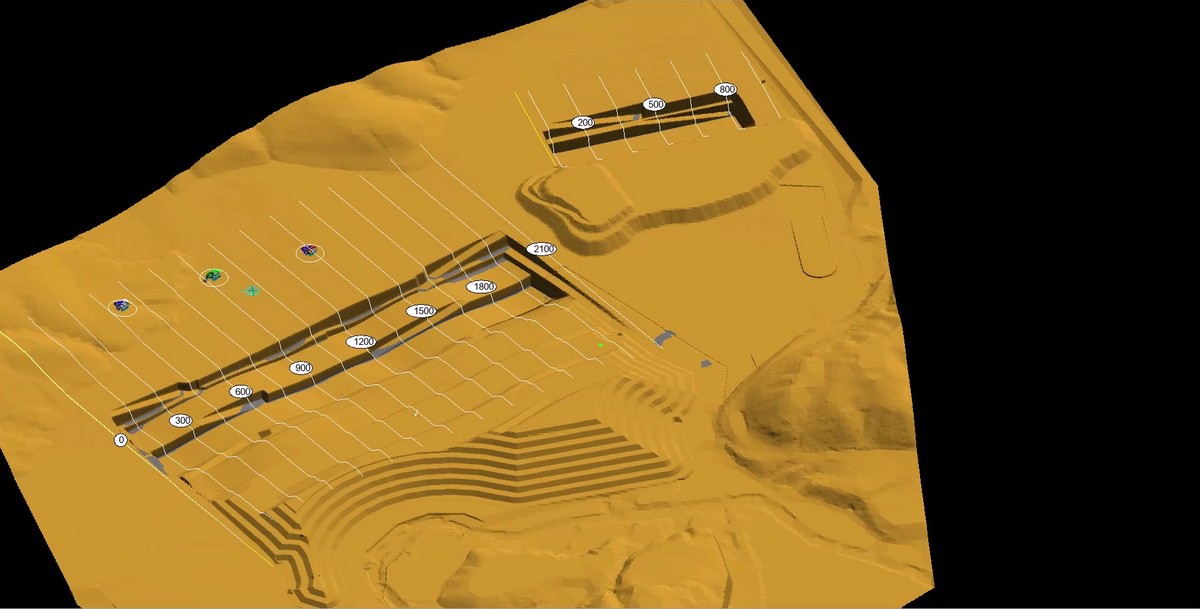
Use the Example Mine, which will be essential for this course, and see how to set up layers, block lines, and material logs for the two pits model.
-
In this module, you will make acquaintance with settings, methods and procedures essential to perform a complete setup of the staged excavations and all Subsequences for simulation of Pits A and C.
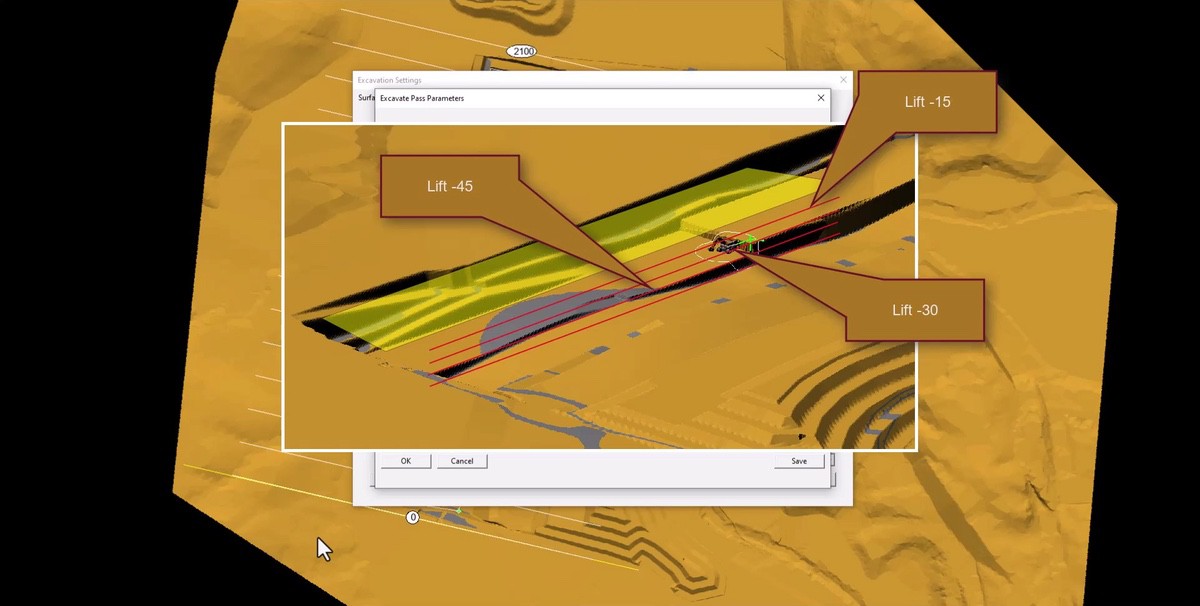
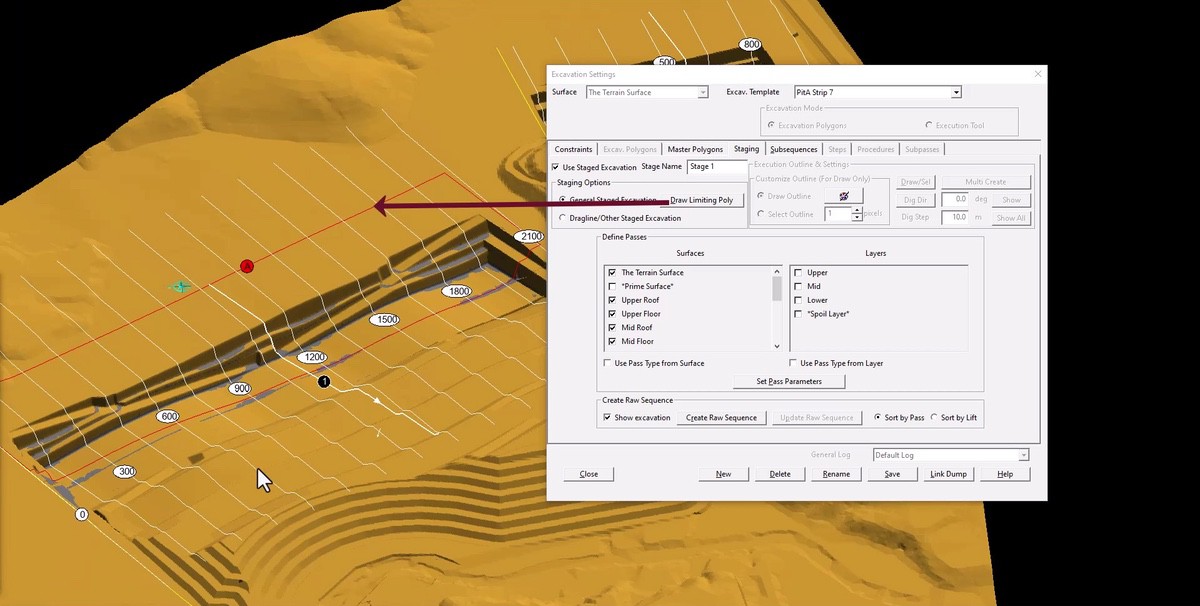
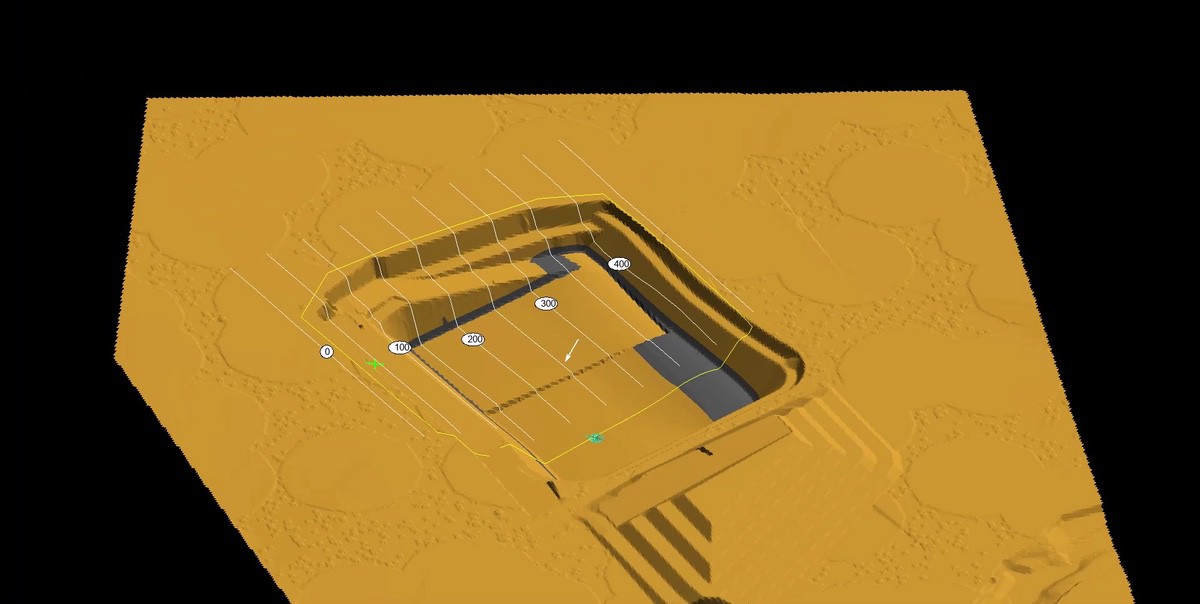
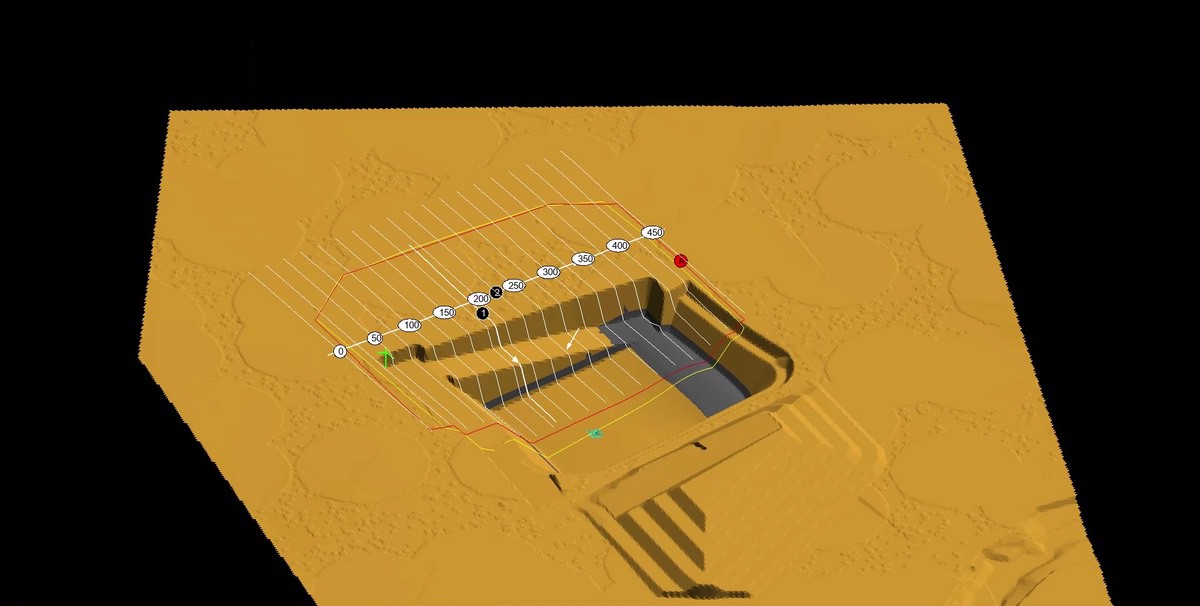
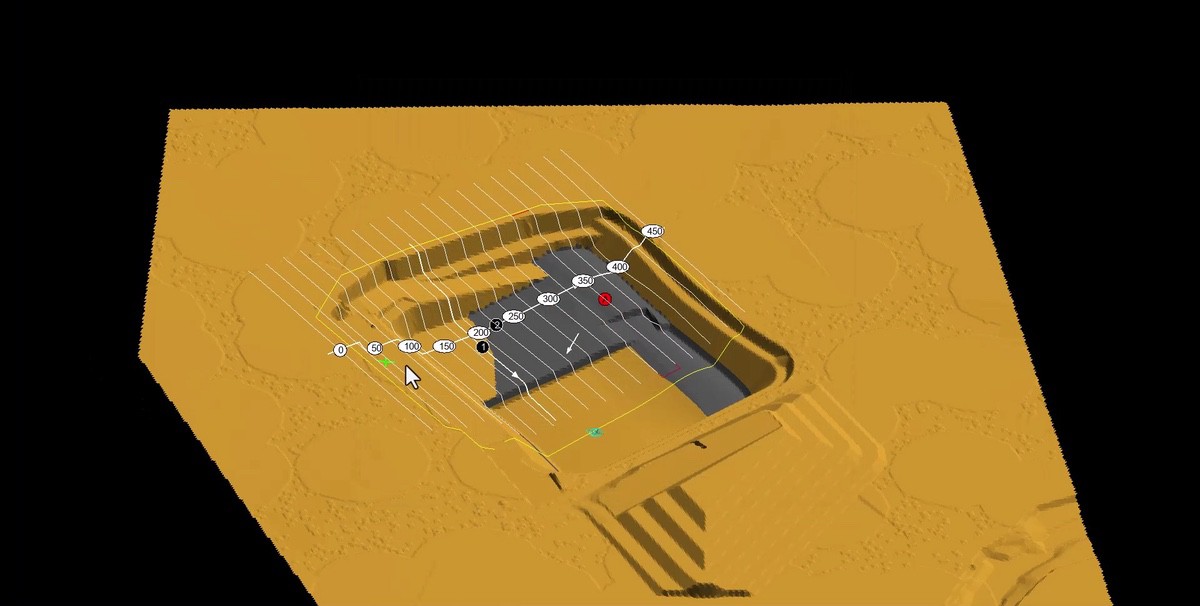
You will set up your first staged excavation and learn about the importance of a limiting polygon, which is used instead of drawing inner and outer polygons. In addition, you will see how to nominate a limiting surface and to set up pass parameters and benches.
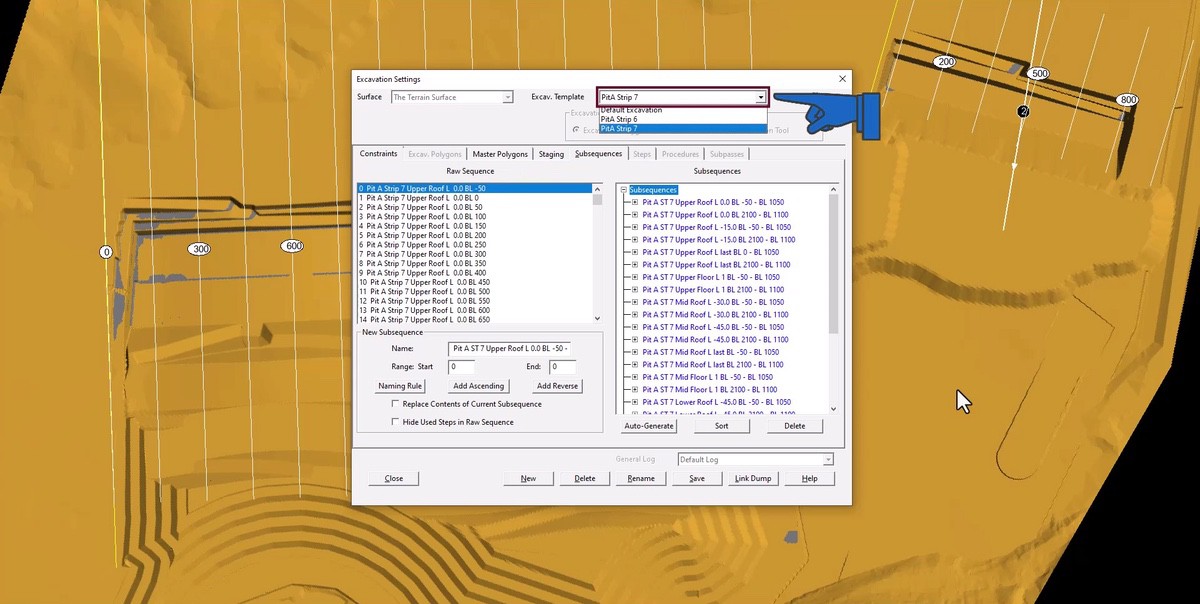
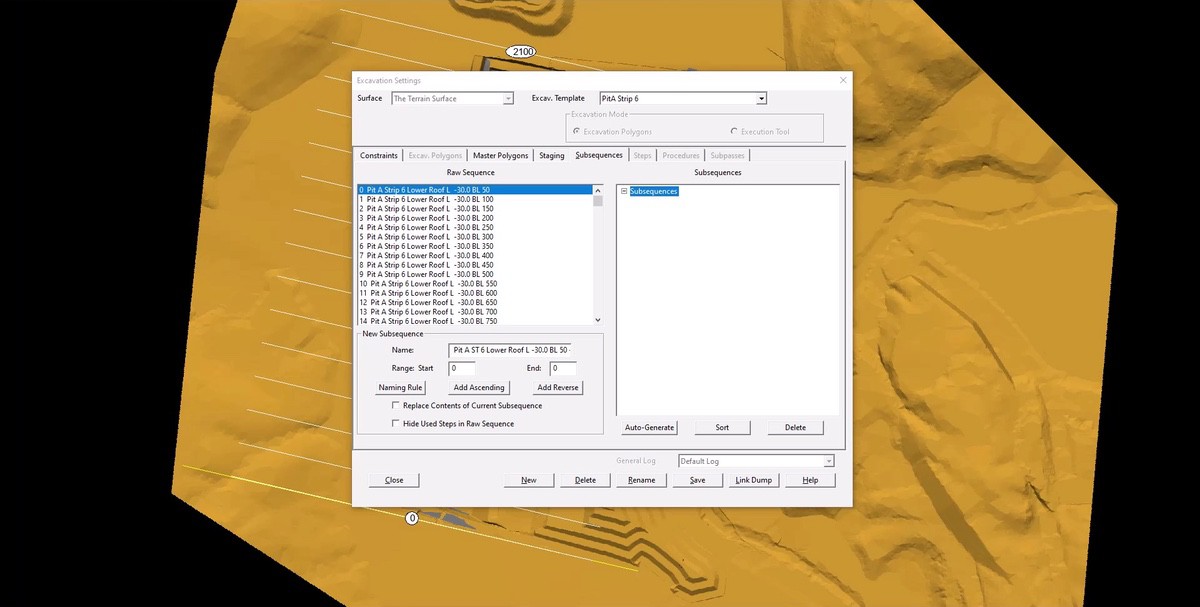
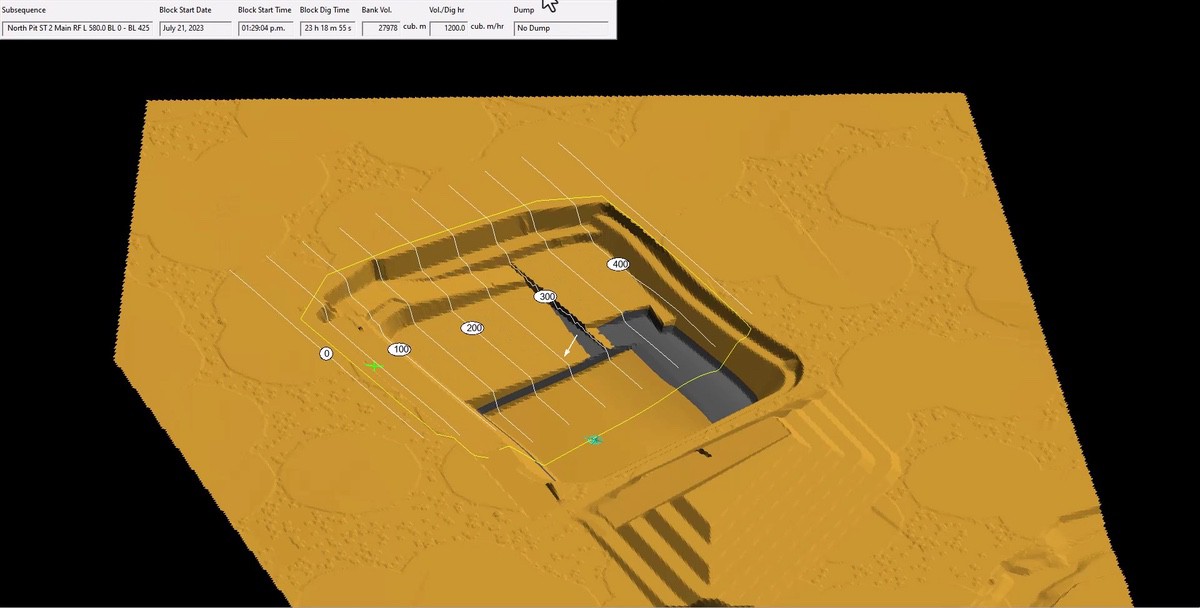
You will explore how important elements like Pit, Strip, Pass, Block range, and Excavation direction, ascending or descending, work together to define a Subsequence. Finally, you will use the Auto Generate function, which allows Subsequences and Supersequences to be assembled very rapidly.
- Set up your first staged excavation and learn about the importance of a limiting polygon, which is used instead of drawing inner and outer polygons.
- See how to nominate a limiting surface and to set up pass parameters and benches.
- Explore how important elements like Pit, Strip, Pass, Block range, and Excavation direction, ascending or descending, work together to define a Subsequence.
Use the Auto Generate function, which allows Subsequences and Supersequences to be assembled very rapidly.
-
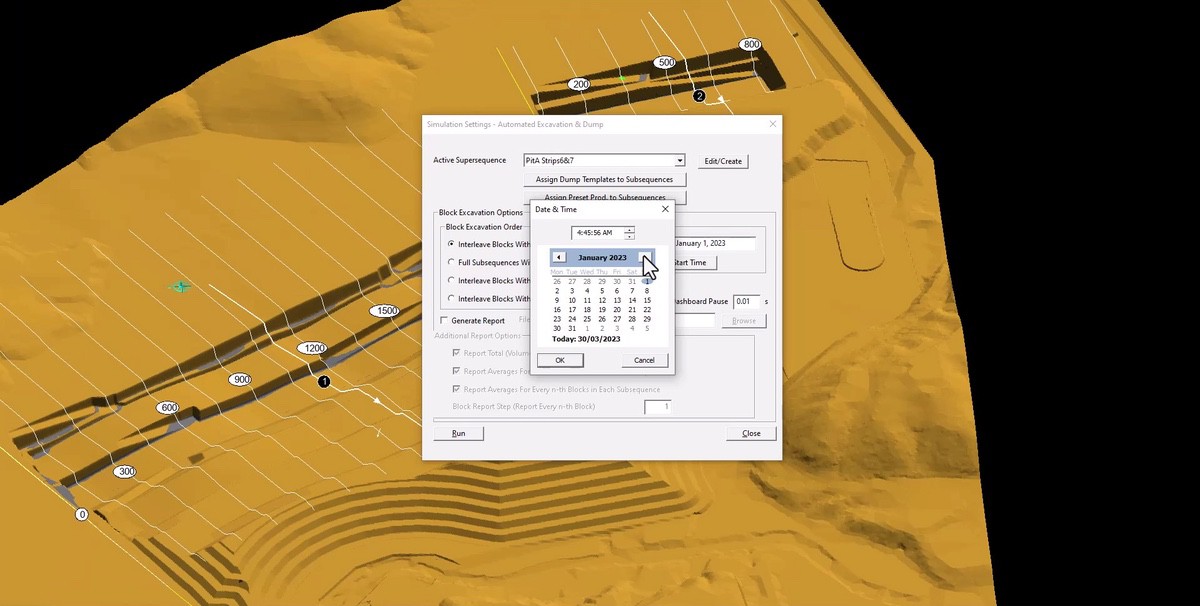
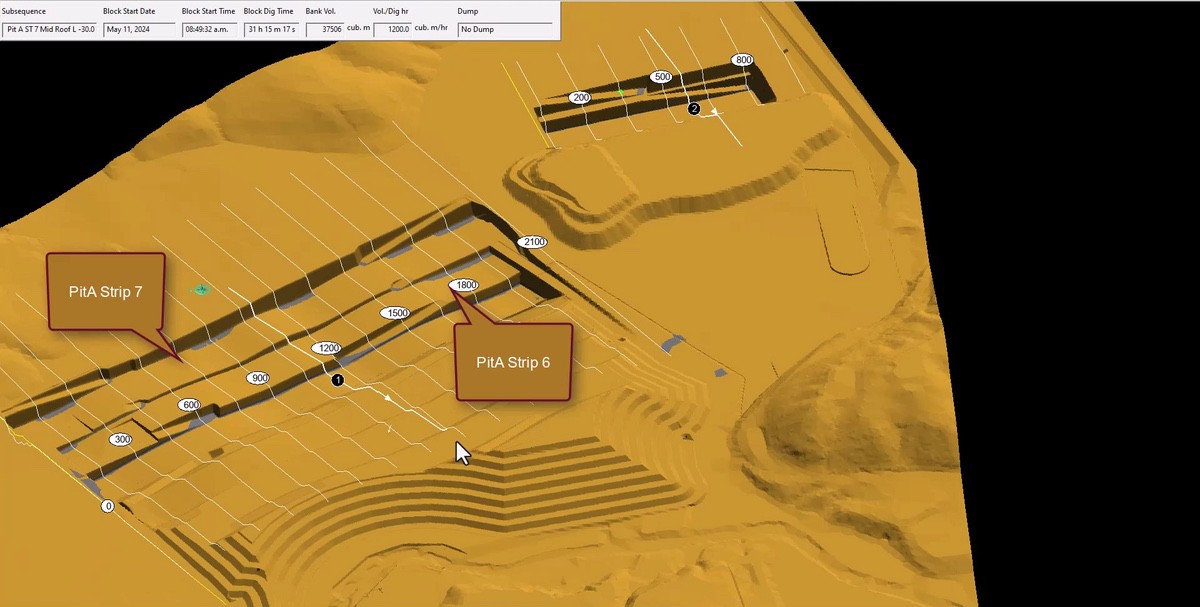
In this module, you will learn about inserting a parallel branch into a pre-existing main branch, while working with Subsequences. The importance of Preset Productivities and Production Rates will be explained. You will explore two ways to overcome the problem of Strip 7's encroachment on Strip 6 after the previous simulation. Also, a procedure of introducing an extra fleet to Strip 7 will be shown. At the module's end, you will see how to transfer report files on the Subsequences data into Excel spreadsheets.
- Learn how to insert a parallel branch into a pre-existing main branch, while working with Subsequences in the Supersequences Editor window.
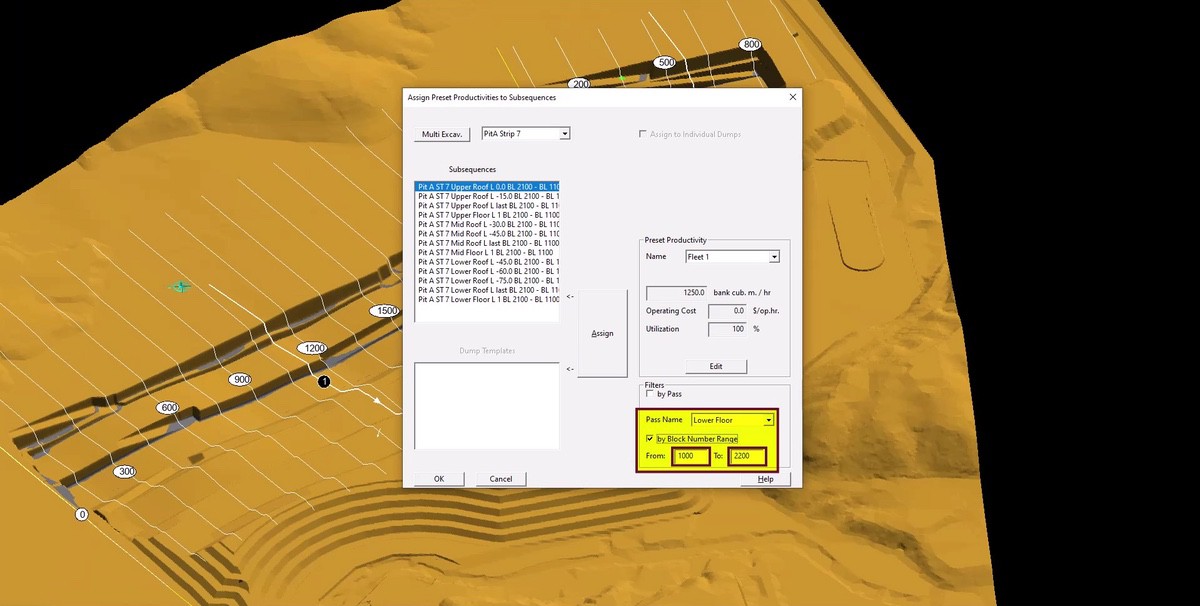
- Set up and use Preset Productivities, using functionality of the Assign Preset Productivities to Subsequences dialog box.
- Add the extra fleet by creating a Supersequence, which has two parallel branches. Try to create and simulate an additional fleet by creating and assigning an additional preset productivity.
- Explore the resulting report file consisting of data on the Subsequences, and manage to transfer such report files into the Excel spreadsheets.
-
In this module, you will see how to deal with the additional complexity of more advanced simulations.
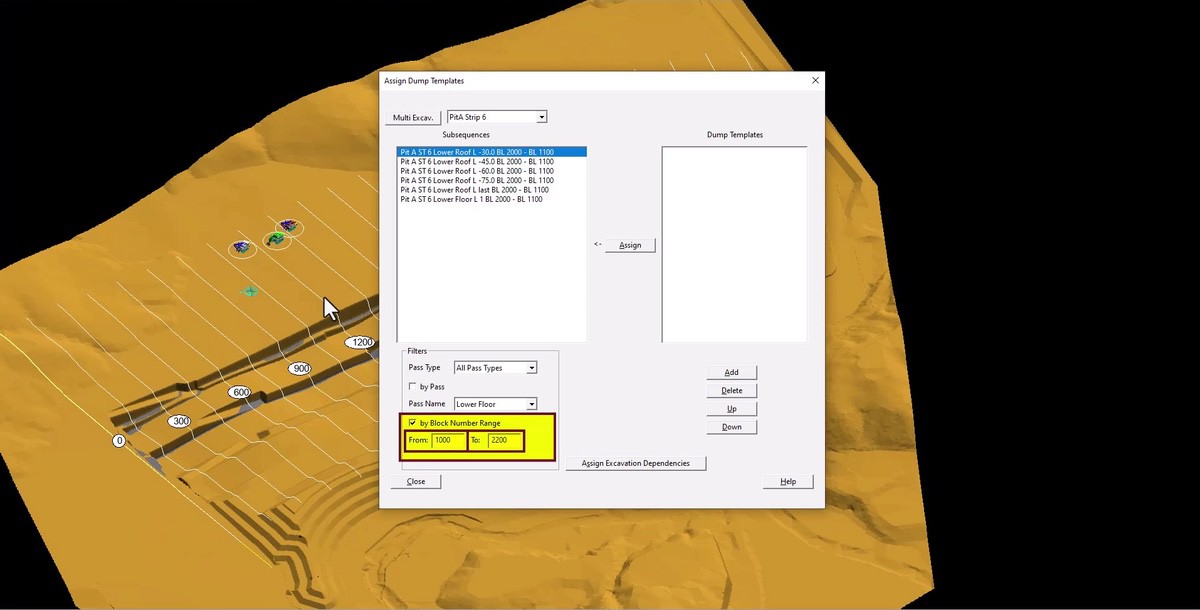
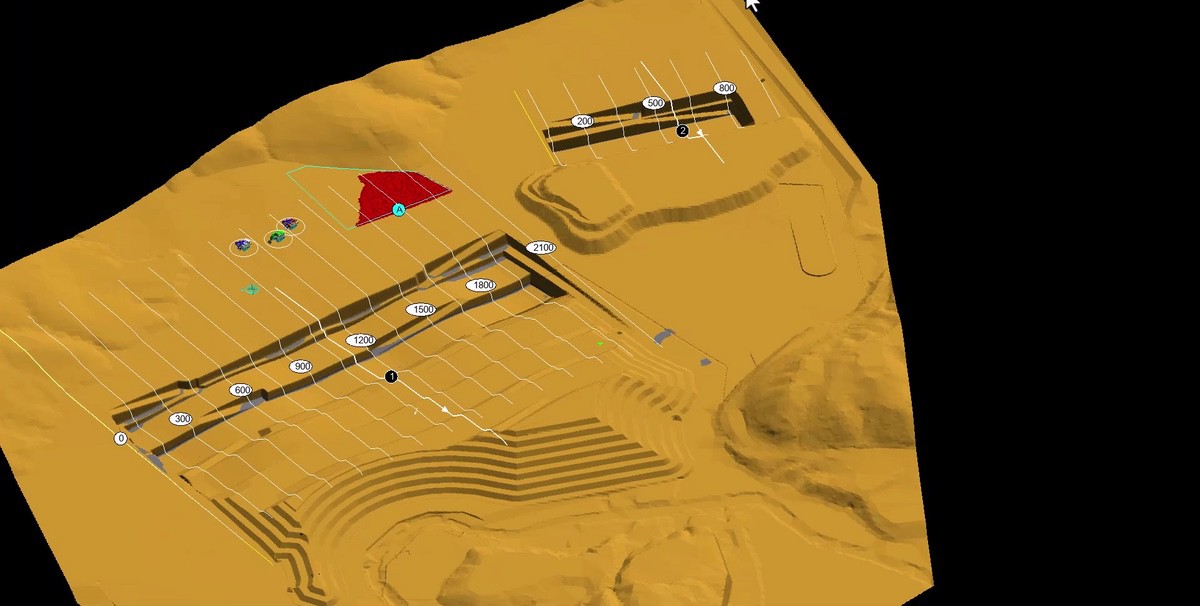
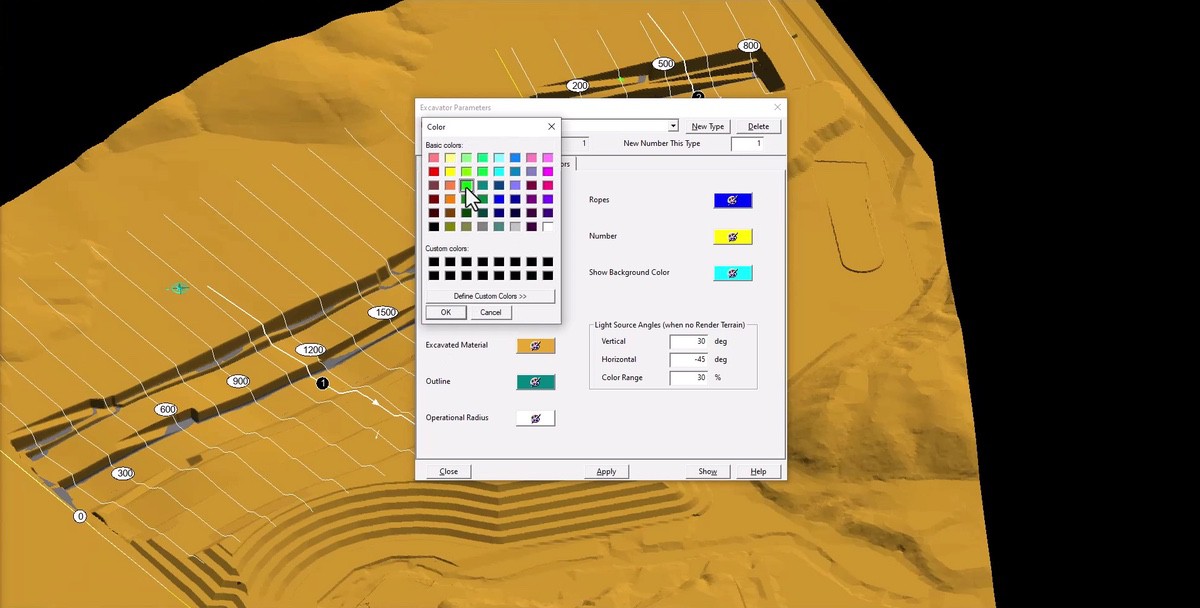
You will incorporate the excavation of Pit C to the Supersequence, and learn how to color-code Subsequences for various passes. You will explore the process of assigning excavators to Subsequences. Also, in the lessons of this module you will learn a process of assigning dumps to Subsequences and Supersequences such that the dumping will occur in parallel with excavation. In the concluding part of the module, you will learn how to adjust capture settings for creation of an animation, and how to transfer and work with report files to Excel.
- Look at the techniques which can assist in dealing with the additional complexity of more advanced simulations, including useful concept of Subsequence Dependent Dumping.
- Improve the legibility of your Supersequences by using a Pass Parameters concept, which will allow you to color code Subsequences for various passes.
- Explore the process of assigning excavators to Subsequences, and learn how to assign dumps to Subsequences and Supersequences so that the dumping will occur in parallel with excavation.
See how to adjust capture settings to create an animation, and how to transfer chosen parts of the report file to Excel.
-
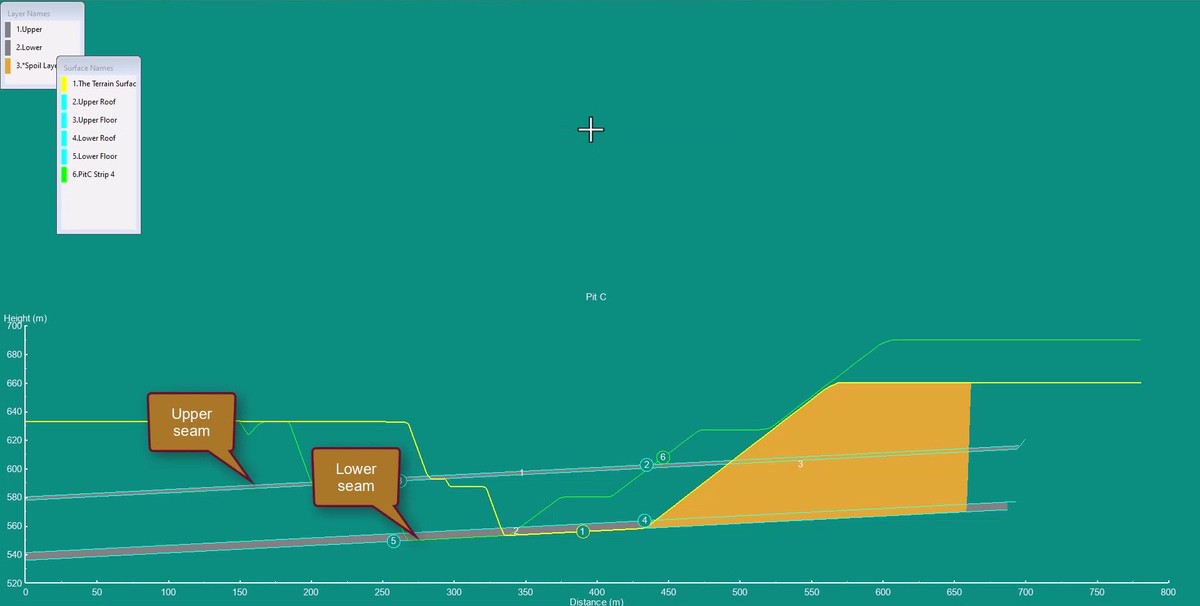
In this module, you will look at an application of the Automated Excavation & Dump functionality for steep-dipping operations. You will create a staged excavation. This is the same procedure you have used many times throughout this course, however in this module it introduces concepts of creating and attaching material logs as well as the methods necessary for dealing with the steep-dipping deposits. At the end, you will learn about useful functions, which have not been covered so far. These include slowing down the speed of the simulation, re-ordering Supersequences, and using the Compound Supersequence and Simulation Map structures.
- Look at setting up a staged excavation for steep-dipping operation, including creating and setting up an excavation template.
- Make acquaintance with the Create/Attach Material Logs function, which allows you to auto-generate the required logs.
- See how to slow down the speed of the simulation, so you can capture more details of what is occurring, and try to apply a function for re-ordering Supersequences.
Learn about a structure called Compound Supersequence, which is a Supersequence constructed from other Supersequences. Finally, use a structure called the Simulation Map, which allows you to get a good overview of the structures of complex simulations.
-
The final module is an exam where you can test your knowledge of the concepts introduced in this course. Pass this exam with a 70% or better to receive your completion certificate.